Wednesday, December 29, 2010

Just a Little Scattered

Salutations again. Oh man, Not feeling I'm getting a lot of actual woodwork done lately... Photo shoot, photo post work, post card writing/design, this little flyer, delivery to the gallery... Alas it's all part of the one-man gig. Then again, it can also be interesting.
Here's a little flyer for the up-coming "First Thursday" at the Northrup King Building. Don't know how many folk viewing this blog are near the Minneapolis area but feel welcome to come by Thursday the 6th, see the new piece &/or heckle me ha.

Just took this cabinet to the gallery today and managed a little rearranging. I was looking to group all of my stuff together hopefully in a manner conductive to the pieces themselves within the boundaries of the tight space. There is a space in the back corner of the show space I thought would be nice. There isn't much there now and it's pretty spacious. Problem is that it's all the way in back so not as attractive to foot traffic. However I would be able to lay things out in similar ways they may appear in a home.
The director suggested the entry. I suppose it's a nice gesture having the first spot people see. However I've seen that the entry way is not a place that people linger. They step in and eyes grow wide wanting to see everything. Then it is just an after-thought on the way out, minds already turned off moving on to the next studio. All that and it's a smaller space. Baby steps I guess. Hopefully I will start to sell, then later we'll see heh.

Post card front and back. The text isn't finalized. This piece seems harder for me to write about than the last two cards. Hopefully I'll have something for the 6th.

Back to the Cherry cabinet. All this touch and go on other projects does not put me in a good state for focused work ha. I suppose it hasn't been the worst timing though. Wipe finish on the carcass and work on the computer till it's time for another coat.
This time 2 coats orange shellac, 2 coast extra blond, 1 wax.

Stuck together after glue-up!
It already has a nice color to it. It should age to a nice rich tone.
At the gallery today I noticed how nicely my Cherry Pedestal is aging. At first it was so close to the AD Maple I used for the top but now there is a clear distinction. A couple months ago it looked a bit gray, monotone, and a little drab. Now it's looking deeper, redder and... sexy?
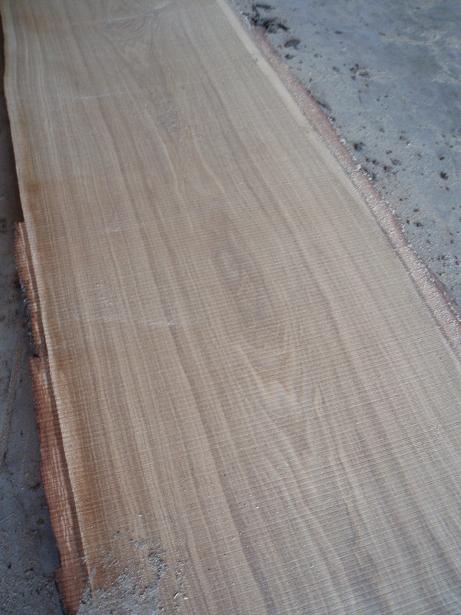
I WAS going to use some of that same Maple I have left over but it doesn't look like it's going to work :(. The two clean pieces I have are too different in color/reflection, and they are too small to make up the back panel on each own. I think Kiln dried Maple is going to be too bright, to much contrast. Maybe it'll look stellar for a month but in a year... not for this piece. I have a lead on some more Maple. Hopefully it'll work out!

Wednesday, December 22, 2010

Maple Showcase Photos

Air Dried Maple, Kwila, Kiln Dried Maple, Olive.
61"x24"x12.5"

This photo shoot seemed to go better. Perhaps I'm getting a little hang of this? Ha not crossing my fingers.
Thanks again to Craig and Carol Johnson for lending me their lights! Lights of my own are on my list I promise heh.
After last time I figured it was better to use a higher ISO level to get brighter though slightly more grainy photos than smoother dark ones. For use on the internet it is basically no visible difference in grain but in print I suspect there will be.
Haven't messed around with them too much in post but don't think they'll need much work.

All the glass in this piece presented some lighting problems as I figured it would. I tried to get around them the best I could but there's only so much I can do in a smallish cluttered space.
Also the size of this cabinet wouldn't allow me to get full landscape shots which is what my website is based on as my backdrop is too narrow :/. I'm going to have to figure something out...

The Olive has mellowed out a bit. They will get a fair amount darker but I had to get the shoot in to be able to get other things lined up to put this guy in the Gallery come Jan.

Grain whoopty-doo :).

Mmmm dovetails... heh.

Steps and curves.

And back to the first shot without contents.

Tuesday, December 21, 2010

10% to 90%?

Hey I'm back from a weekend in Milwaukee! What a craptastic drive home it was through another snow storm in rush hour. Milwaukee however has no snow in the streets... jerks ha.

Before I left I was getting some good work done.
It is said that it only takes 10% of the total time in a project to get 90% completed. Well the carcass of this wall cabinet has sure come together pretty quick.
Above pictures one of the sides being cut to final dimension. The stop-block ensures that the next side will be "exactly" the same size.


Dressing the end grain of the sides straight and true... and smooth.

Doweling jig for the carcass joints. Just milled up some sticks of 3/4" Maple (enter any other hard wood) and plotted out some dowel holes. Later it they will get a 3/16" hole at the back and a 1/8" hole in the front, I will just be using dowel center finders for that.
I have a block for the right side and a block for the left side. Temporarily nailed into the sides to hold them during operation.

Once again I have made a spacing template for joint location in the top and bottom. Once again it is tapered ever so slightly larger at the back for fitting a partition. As you my know I love these simple solutions. Make one template and it helps take out a number of small inconsistencies that may occur otherwise.

With the correct block nailed to the correct spot it's on to the drill press. Set my depth stop about 3/32-1/8" from going through and drill.

BAM! Almost a cabinet ha. Sides have been shaped with curves kicking in to the front and end grain on top and bottom to match. Before doing the shaping on the front edges I want to get some work in on the door.
These pieces still seem to be moving on me a little bit. The trip over the weekend was a good way to get away from them for a few days. Hopefully they have sorted themselves out and I can touch them up when I get back to them.

Helping me out with some door frame shaping is the newest addition to my tool wall. A larger round bottom spokeshave from LN. I've been wanting to get one of these for a while. I tend to do a good amout of curved work and don't see that changing soon. I have been making due with a flat bottom but it has become apparent that it simply doesn't do the same job. One could make a compass plane but I don't do as well with those. The curves are irregular so there is very little contact on the sole of the plane. What's the point of having a whole plane? Some people like the feel better and do better work with them. That's great, unfortunately not me heh.
I find the Veritas spoke shave to be more to the liking of my hands. More ergonomic for me with nice placements for your thumbs and fingers close up to the blade. Allows me to work more comfortably and with more control. However the Veritas round bottom shave has a heavier radius than needed which decreases the stability of the cut for me. I tried both at IP from my classmates and seem to do better with the LN's shallow radius. So now I have one. The LN is prettier than the Veritas heh.

Saturday, December 11, 2010

Snowed in and wood settling

Well hello again. Woke up today to an unpleasant sight. You're looking at about 8-10" of snow there and there is no sign of it letting up.
My plan for the day was to rough mill parts for the Cherry cabinet and go to work at the part-time for the rest of the day conveniently getting paid while I let the wood settle a bit. My car, however is going no where in this snow so I'm snowed in with nothing to do ha.
I figured I'd chat here a little bit.

Put a new blade in the band saw this morning. I love the feel of a new band cutting so smooth and easy.
This is basically the yield of the whole plank pictured yesterday. It may not look like much, and it may not be, but beyond cutting off sap there was very little waste after joining and planing the stock... perhaps 20-25% Which is pretty damn low for this kind of work!
Pictured there is the top, bottom, and sides of the carcass. Also the frame members for the door. I still need to find the back panel frame parts, mullions (pieces separating glass in the door), and the horizontal partition or "stage" as I like to call it in these kinds of cabinets. Finding the partition is going to be the trickiest. Usually I get it from the same plank as the carcass which was not possible in this case. I wont be able to find a "perfect" match but hopefully I'll find something that looks good.

I've always had mixed feelings about Cherry. It's every where. Whenever you talk to people who aren't "bit by the wood bug" they only seem to care or know about Oak, and Cherry. I've seen a lot of "bad" work in Cherry. A lot of misused perhaps abused Cherry. So many woodworkers go on and on about how great it is (many of whom are the misusers). It's gratuitous.
All this gives me poor connotations with the wood. However Cherry IS nice and CAN be used to much success. It's relatively light and sturdy. It works very well and has little blunting effect. It has potential for a variety of finishing choices. It has lovely depth of color (when not stained [as it should be ;) ] ). The wood even smells a lovely soft sweetness. The trees themselves are romantic sights in bloom and bearing fruit.
It seems a lot of these connections are lost in much of the work I see in Cherry. I would love for this piece to come together and for an audience to be able to sense these things, the "nature" of the material. Perhaps, if it is a success, they may wonder why other work in Cherry isn't like this? ... That may be a stretch but it is nice to think about and perhaps wish or strive for.

I have a sudden craving for some cherry lambic.

Friday, December 10, 2010

Moving On Again - Cherry Display Cabinet

Now that the usual trouble with glass is out of the way (this time the shelf edges were not polished) I can move on from the showcase until I'm ready for photos.
Yay! My paper work finally has a home beyond a drawer in my room ha.

I've been wanting to frame these since I came back (May 2009) but have been so busy with other work.
MCTC, IP, and my IP class photo :). I still want to make a little shelf for my JK Plane but will leave that for next break maybe.
Love those little steps, I can't get away from them now.

I already can't remember the grass and the cool fall nights. The snow and cold is a familiarity I wish to depart from. Shivering mornings combated by the dry heat of a small electric radiator. I need to adjust the drawers in the Maple Showcase as they swelled just a little being moved upstairs.

Next up is a wall hung display cabinet in AD Cherry!
For those in the "Krenov circle" this kind of cabinet is not new. A form so simple and elegant is bound to be come to by a variety of people independently, and one may expect, be repeated.
I love this form and have been waiting for a good time to build one. The specifics and details will vary with the voices of the lumber and maker. It is not and perhaps cannot be an exact "replica" of an existing piece.
The Cherry lumber has already put in a request: smallish. This is the best plank of cherry out of a small flitch and still has some defects to be weary of. I think I will go for about 1/2" bigger in height and width than the mock-up.

Also this time I'll be using a French Cleat to hang the cabinet due to the properties of the wall it is to go on. A cleat is easy enough but what gets to me a bit is the space needed in the back of the cabinet. One might say that an extra 3/8" or so is no big deal. Sure, but with a small cabinet that amount can be somewhat significant in a visual sense. I'm pretty into stripping down to "essential" space and size. The problem is that the "show space" (interior) of the cabinet may feel slightly small if I make the carcass the size I see fit, or the carcass might seem a little deep to get the show space I feel good with.
Currently I'm siding on the show space side. Probably because of a drive for function I tend to have.

Monday, December 6, 2010

Finishing Touches, Teaser

Finally, the last touches for this cabinet. Pulls, levelers, flipper-floppers, and consoles.
I'm using my boring machine to dill holes for the drawer pulls. Pretty handy to have one of these to cut out variables of using a hand drill.

I'm going for post and bail pulls. I like them a lot. They are more work in the joinery side of things than other pulls, but they are just so classic! And the cabinet being a pretty structural piece, they fit.
Here posts were cut to size, and tenons/shoulders cut on the table saw. There are two posts joined at the tenon here as the pieces are easier to work like this.
Holes being drilled are for the bails.

Aaaand the bail stock.

Moving on to the consoles, the little shelf supports. I'm using some Boxwood I had left from Robert at IP. It looks soft but the wood is quite hard. It also smells a bit like Swiss Pear.
I machined them in pairs connected at the tips. Once again, much easier/safer to work with them like this. Tenons/shoulders on the table saw, and used a forstner bit to cut that round.
There's only going to be one shelf in this piece but I'm making 8 consoles. How much of a drag would it be to lose one of these little guys and not be able to use the shelf!

Here are a couple done.

TEASER! Ha. Well here you can see the pulls done and in place.
They are made of Olive and are quite yellow now. I think I'm going to let them oxidize a bit before I do a photo shoot. They should reach a mauve-ish brown in between the Maple and Kwila.

Monday, November 29, 2010

More Drawer

BAM! Poof! Drawers!
So here are the drawers all fit together with groove for the bottoms. It was all kind of a whiz, a blur of work and interruptions coming from my part-time and the holiday. I don't clearly remember working on these but there they are heh.

The grooves for the drawer bottoms are easy for the flat parts. Curved parts take a little strategy... Ha look at my angled, curved "jig". Crude, simple, and effective. Just how I like them.

Here's a nice little trick to plane your drawer sides. I just used the lag bolts and bottom cross member of my chop-block with a cut of Birch ply to get the support and clearance I need for handling the drawers. With bigger drawers one may want to double up on the ply.
Careful for blow-out at the back of the drawer planing through the end-grain of the pins! Just give the back corners a bevel and your good to go.

Boof! Drawer bottoms. 1/4" thick bottoms of the same Maple the drawer sides are made of. The "dot" in the middle of the bottom at the back is a screw to hold the bottom in place. When making the grooves for the bottoms I made the groove in the fronts deeper to allow for seasonal movement in the bottoms.
The drawers are done except for pulls and finish.

The last thing I needed to do with the stand itself is locaters for cabinet placement. I used a template of the cabinet base to plot a pair of dowels going into the stand and bottom of the cabinet. Kind of cute little things made of Kwila. Could have more easily used standard dowels, but come on heh.

This project is finally coming to a close. It's hard not to rush these last steps/details and move on. I'm getting pretty sick of staring at this thing all day ha. It would be nice to not have another job so I could get these pieces out from under my nose in half the time! Well, one can dream...

Monday, November 22, 2010

Stand assembled, on to drawers

The stand is assembled! Thought this cluster of joints looks pretty nice. Too bad people wont be seeing it heh.
On to drawers, but first I need the pocket partition. You can see a groove routed in the center of the web-frame. That is for a spline to get to join the partition.

Fast forward the partition fitting, it's just shooting until snug. Here is something a little odd. End grain on long grain. Sounds like a bad idea, but with only 2-7/8" tall of quarter-sawn Maple I'm not worried about it. The dowels give most of the holding power here.

Pre-finish the front section the same as the web-frames and glue her in. See the nice consistent lines of dark and light wood, thanks to my little end-grain joint there :). Well, I like it ha.

All the drawer stock was preped and it's once again dovetail week. These 3-way angled joints on the outsides aren't turning out too hard, just a number of extra things to keep in mind.
I'm using the waste side of the drawer fronts for my cradle. It already had the same curve, just clean it up a bit, make a mating chop block and your set! This seems to get easier the 3rd or 4th time around ha. Well, maybe not easier but quicker and smoother.

Cutting pins. This time around I'm getting a little bit more "free". I have mapped out about where I want to points of the tails to be and then just free-hand drawing the line to be cut. There will be a bid more variation in the joints which I like. Don't know if it is best for this piece but I've been getting a little worn on how "polished" this project is ha.
The Kwila feels a bit dry and stringy under the chisel. That and it was killing my edges with that silica Kwila has. I raised the bevel angle by perhaps 2 degrees, and put a slightly heavier double bevel on. That kept me going.

The Maple feels like cream compared to the Kwila fronts! The fronts are more forgiving though.
Here sawing up some tails for a drawer front. Saw to the waste-side of the line! If you saw that line off, you might as well stop and try again. However the further away from the line you saw, the more work you have to do to fit them and the more likely one is to screw something up. It's a balancing act that I'm getting a little braver with heh.
I have more chopping and paring to do. See you when the drawers (hopefully) come together!

Monday, November 15, 2010

Web-Frames

Back to the shop! Web-frames for the Kwila stand. The web-frames create the drawers pockets I'm wanting in the stand and give the stand way more strength than it needs heh.
Pictured above, using the band saw to cut the slip tenon mortise.

On the table saw cutting shoulders for the tenons

BAM! Fit slip tenons with allowances for easy clamping.

I guess I forgot to photograph the center piece for the drawer partition. Well, it is fit with shooting board and block plane then doweled into place. Pictured is applying the Kwila front edge.
I have enough good Kwila to have made the frames of all Kwila but I like the look of the Maple. A nice splash of colors for the curious. That and the drawer sides are going to be of the same Maple, it will all be nice and bright in there.

Fitting the frame to the stand and making it all nice and square. The nice thing about the web-frames is that when gluing up I know my stand will be square if the frame has a seamless joint. That is without ridiculous pressure.

Both frames fit with splines and dowels... I don't think they are going to go anywhere heh.
On to edge work and pre-finishing.

The first glued assembly of three, scary! It went smoothly enough, I'm glad I had an extra set of hands.
I can sense the light at the end of the tunnel... not there yet!

Thursday, November 11, 2010

A Man and a Mill

A little while ago I was invited down to Spencer, IA to meet a man with a passion and a mill. Tuesday morning I made the 4 hour trip.
Spencer, I was informed is a bit of a railroad town denied the railroad. Charming yet strange. Brandon is the resident wood nut heh.
I have seen and participated in a bit of chainsaw milling and I have seen a little of a band saw mill in action but have never seen the whole process let alone operate one. Brandon showed me some of the ropes.
It was a great experience gaining new appreciation and having a good time.

I saw a log of Walnut among a few others behind the barn that looked promising to me. Brandon got it on the mill with a tractor and asked is I wanted to "drive" the mill. After getting the log oriented in the way we thought best suited it we went ahead with flitch cutting the log. Perhaps the easy way to mill but my preferred method.

This Walnut log was about 22" in diameter and 8.5 feet long. The mill was pretty easy to operate. Up and down, forward and back, and a speed control. Then again, a hand plane is pretty easy to operate in theory.
The belt drive decided to take a short smoke break as it was displeased with some of my effort. Brandon assured me all was fine.

Whoo Wee! You don't see logs/lumber like that every day! I don't anyway. Clean and  mostly straight with only one sizable knot to work around.

Don't get drool on your key board...

Staked and stickered. all 8/4 (cut green at about 9/4) with the pith plank being about 10/4.

Next I was wondering about a log of Bur Oak out back. Nice straight and long. This one fought though. After the first pass we hit a nail. Then another. The log was getting shorter due to cutting sections with metal off. You can see the start of some black staining due to the nail(s). Then hit some copper too!? Ugh. One thing lead to another with some tools and we had to retreat for the time being.

Beautiful color and grain in this section. I hope more can be salvaged!

Well sir thank you for the time and hospitality, I shall return for more wood. So watch out!