 All right, a bunch of images for such a little cabinet. I figure with such a "simple" pieces it would be a good platform to cover more of the process bases in a more simple context. I think there's at least one person out there who may be interested :P.
As basic as the Key Cabinet is I am doing a fair amount of shaping. Kind of my "thing" I guess heh. I'm giving the sides a rounded (convex) and splayed shape, the door is also convex in shape from a solid cut of Walnut.
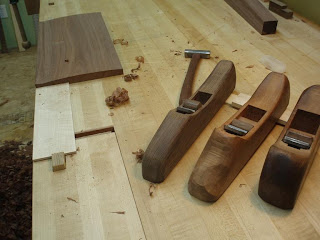
Above I shaped the outside first with a little "whoopdie-doo" lip that will act as the pull. It's nice to have different sized radius planes around :) for the outside I used my smoother, a 1-1/4" coopering, and 1" coopering planes. For the inside I used a 1-1/2" coopering plane (3 of my 4 coopering planes for this little door heh).
 Roughing out the inside concave curve of the door on a table saw. One can hog it out by hand perfectly well and sometimes I choose to do so but I had already done so much planing my arms were a bit tired. Also as a man who looked too much like Kid Rock for his own good said "there's no art to waste removal." Whether you agree or not is a personal matter heh but I am looking for a balance somewhere between machine and hand.
 With the door roughed out it doesn't take too long to get to that final shape.
The major shaping done it's time for some cross cuts! Cross cut one side of the sides and door where desired then clean and square up those edges! THEN set up the good old stop block to make the final cross cut. This order is particularly important/helpful when using a lightweight table saw such as the one in my shop.
Get those ends cleaned up and the same size and on to doweling.

Little doweling jigs for little sides. I plot them out and drill the jigs on the drill press before going to the boring machine, do whatever you like heh.
Ah the Davis & Wells boring machine. Probably my favorite machine I have. Not nearly the most used or versatile but I like it. I love its simplicity. A motor, a belt, a spindle, and a chuck brought together by about 220lbs of cast iron!
Anywho I mark the drill bit as to how deep I want to drill. This comes in handy when switch drill bits for the same jig. For these little guys I have four 1/4" holes and one 3/16" hole.
Oh yes, little nails hold the jig in place.
 Next the top and bottom. Here I'm once again using a template for the jig set-up. I prefer this to drawing lines. Just cut a scrap the size of the internal space of the cabinet. Square up the sides. I plane a little taper towards the front (putting "let go" into the cabinet). I'm not making a drawer for this cabinet but I am fitting a partition, and it's good practice.
Place the template on surface where desired. I'm using a block to register the template and jigs at the back. Nail one jig one, hold the other jig snug and nail that one on. Take to the drill press to drill, and repeat for the top.
 After fitting dowels this is what I have thus far. It will be a cute little guy I think. It should have a name like Wilbur or Wally... damn I like Wally if not for the pun >:/.


