Thursday, September 22, 2011

Nightstands - Complete!

Nightstands - I haven't come up with an "official" name for these guys. I'm thinking I want to give the "style" a name because I think this general form could be adapted for other applications... say, a low bookcase/side board. Hmmm it is certainly tougher for me than building the pieces ha.
Any suggestions as to how to go about this?

22" H x 20.5" W x 16.75" D.
European Beech, Kwila, Brass (brackets).

Decided to skip the last process installment as it was pretty quick and simple/repetitious heh.


Oh boy, I'm a little tuckered.
Before seriously moving on I think I need try to clean and organize the shop and space before winter bares down on us. The next proposed project ("sofa") is going to take some decent R&D for me. I think a cleaner space will help me out. Perhaps I should get some R&R before that... doubtful heh.

Wednesday, September 14, 2011

Box Assembly, Stand Stuff

Here we are again, and as promised I'm back with the glue up.
With 14 dowels per joint and four joints per box that adds up to 112 dowels plus the two dowels per apron to side joint gives a grant total of 128 dowels!
The dowels I got this time around (same dowels I always get) are harder than they have been in the past. Hand rolling them with a file to compress them was becoming a pain in the neck, and arm.
I decided to take a piece of brass and drill a 15/64" hole in it (1/64" smaller than 1/4") then tap/hammer the dowels through. Turns out it's a sloppy fit.
Well today I happened to need to go to the tooling shop to pick up another end mill bit. I bought an alphabetic "C" and "D" sized twist bits that are both between 15/64" and 1/4"... see if one of those works out for me next time.

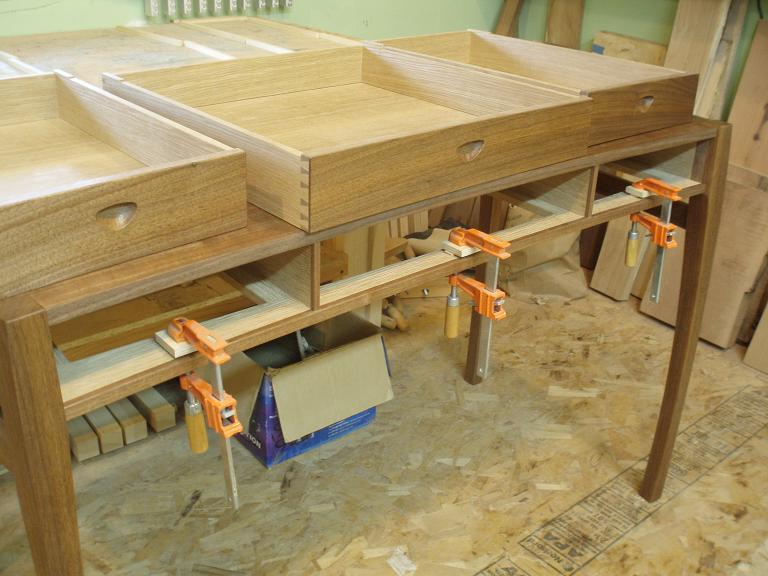
Whole lot of clamping going on.

While glue-ups were drying I thought I'd get going on some brackets for this project. These are what I needed a new sized end mill for. I'm attaching the box portion with #6 sized screws with brackets that need to allow for movement. The 1/8" bit I have is just too small and 3/16" too big. I got a 5/32" bit. Haven't gotten back to the brackets yet though.

Onward to stand stuff!
Cut the stubby little legs to height and the aprons to length including that 2 or 3 degree angle I'm using.

Spent a little time cleaning up the end grain cuts on the aprons fine tuning that angle and making the leg end grain smooth and square.

Hadn't decided how I was going to get the slight angle in the aprons to match the legs. Decided to plane it in and use square(er) joinery. My work horse 45 degree smoother wasn't giving me the best result with the temperamental Kwila. I grabbed a higher angle smoother I made in school that I haven't used since I've been back. Quickly trued the sole, ground and honed a new edge, and gave it a test run. Seemed to be what I needed. Opened the window to the cool air set my blade for some fine shavings and got to it.
As small as this step was, the different between top and bottom edge is only 1/32", it was probably the best moments with this project thus far.
Bringing another plane into use again, making some fine shavings, freedom of shaping, sight sound and smell of the kwila, the air; it all just came together.

In short order it was back to machining. Mortising. Though with the joinery so relatively simple and square it went without much fuss.

I had decided to keep the legs square for joinery, now it's time to give it some tapering. I made a little jig to help me out. These are the first "straight" legs I've made since my first year in MCTC!? I usually can't/don't use jigs with curved legs.
The jig just cradles the leg and I cut the taper I want into the side of the jig that hits the fence. Quick and low-tech!

Ok, calling it quits on this entry here!
Maybe I can get these done in another two weeks?? hmmmm

Thursday, September 8, 2011

Doweling to Pre-finish

Alright. Once the components of the boxes were sized and all it was time for the major joinery of said boxes, doweling. As always I'm using doweling jigs. This makes an "exact" set of holes repeatable.
First I bored holes int he vertical pieces.

Then swap the jigs over to the corresponding sides for the top and bottom pieces... that is the bottom of the top and the top of the bottom ;).
Bore holes on the drill press setting the stop as to NOT bore all the way through!

Made a dry run to be sure things were working out and continued on making the aprons, doing some final reveal trimming and all the edge treatment.

Another check with it all together before pre-finishing. Box!

Then guess what? Yep, pre-finish!
Good old shellac and wax for these guys.

Be back with assembly and such, till then, later on out.

Tuesday, August 30, 2011

So Much Surface

Back again! Well, I have been working, it's just been repetitive and not photogenic heh.
After machining down the components of the box to relative final thickness I was turning between planing the surfaces, and clamping up edge joints.

After each edge joint is dried, it's back to planing, then back to joining again, and so on.
It may not be the most exciting process ever but it is enjoyable when the work goes well and the bits turn into something more.

Mustn't forget about hitting the sharpening station about every five min. My poor iron has just about had it. I finally ordered a new one yesterday... Can't wait for lapping ha.

So the surfaces had all been glued up! I trimmed and squared the surfaces and took some time to clean up some edges. Here is my block plane taking a shaving from the end grain of a top piece.

Ha, knew this post would be short relative to the work I've put in, and it may happen again...
Till next time!

Thursday, August 18, 2011

Photos : Walnut Desk

Walnut Desk
30"H x 47.5"W x 22"D
Air Dried Walnut, White Oak

Moved photography efforts to the garage. The basement is a bit cluttered at the moment. The garage does seem to be a decent fit though I still like more room. Mainly to get further away from the piece.
Here trying to photograph those pulls... tricky!


Wednesday, August 17, 2011

Nightstand Milling

Here again a a pic of the Nightstand mock-up for reference :).
It's nice getting into new work though ideas and drawings of this piece have been around my head since March.
The box portion will be of Euro Beech and the little stand will be Kwila.

A quick change of band saw blade for the new project and I'm off doing the major milling for these little guys. Here re-sawing Beech for the box portion. Beech is a bit soft compared to Oak but it's creamy dense structure makes it more labor intensive for the saw to cut through.

After getting covered in Beech dust, this is what I came out with. All of this material is for the box surfaces. I'm always surprised at how much material I need. I got 2 10' long planks and there is hardly anything left of them!
As I mentioned a while ago I wasn't the greatly pleased by the selections I got from A&M this time. One plank was much wider than the other and the center was lop-sided with a number of defects. The other more narrow plank was cleaner yet had some wonky grain going on.
I am doing the best I can to put together a clean product and think I will end up with a decent conclusion, it's just a bit more challenging. That of course can be interesting and fun in a way.
For the kind of grain graphic thing I'm going for one could be ripping smaller sections of the material and reassembling them to coax a nice smooth "one big plank". I've done this in some veneer work. However in this solid wood form I'm feeling the urge for simplicity and honesty, not that my other works aren't honest which is something I strive for... hmmm difficult to put into words.
Anywho, My intention is still that of "one big plank", which is much more than just throwing boards together, however with this selection there is just no way to get the smoothest transitions. Rather than fight it, I feel it more "graceful" to except it and "embrace" it for what it is... kind of getting to my Nakashima influences heh.

Back to mill work!
This is the Kwlia for the stands.
I happen to have one left-over narrow plank from my last order from Cormark Int. for the Maple Showcase.
The grain is straight and the color a beautiful rust brown with a bit of red which I feel will be lovely against the cream and pink tones of the Euro Beech.
I must say that I'm quite happy I was introduced to Cormark Int. (http://www.cormarkint.com/) by my benchmate and  friend at IP, Jason D. The guys and gals there care about what they send out have been great for me to work with. My only complaint is that they are far away from me in NC. Cheers.

Monday, August 15, 2011

Done. With the desk.

The last couple things for this project went relatively quickly.
Carve pulls.
Make drawer bottoms.

Oil drawer fronts.
Make drawer stops.

Done. Hopefully I will get photos taken and up in the coming weeks!

For now I cleaned up my bench room a bit to make room for the next project. As some will know, a pair of nightstands/side tables made of Euro Beech and Kwila. Just set these planks of Euro Beech up to ponder my component selections. I have yet to make any cuts as I need to go to work to make pretty coffee drinks at the bakery soon. Perhaps I will start tomorrow unless I can get my hands on a backdrop stand for desk photography.

Chao! - NN