Back to the Desk!
Once again I'm working with angles off 90. Furthermore none of the leg joinery angles even repeat! Well except for the side apron and side stretcher because they are on the same side.
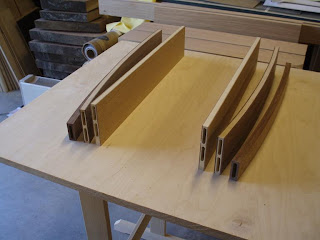
I rough cross cut components on the table saw and took them back to my bench where I used this perhaps odd set-up. Dig it or oppose it, this is the way I tend/like to work heh. With no angles matching, what's the point of making fancy jigs? I'd need like 8 of them! I simply used a little ingenuity in choosing how I made the cross cuts on the table saw to be able to dial in the angles afterwards with minimal sweat :).
I'm not a machine, I'm flexible, as are the projects I work with. I train to trust and be confident with my hands to be able to effectively fine tune complicated builds like these. SOme will school me with jigs and machines, but as one would guess they're simply not for me ;).
However I DO like to use some nice jigging! Love that boring machine and X-Y table (if only I had a proper one).
Above is a top view look at a back corner of the desk "shop drawing".
To the left the side apron comes to the leg and to the right the back apron meets the leg as well. The further to the right there's a drawer pocket partition. Always looking to maximize joint strength, this is what I've come to for this corner. The back apron was thick enough for two 3/16" tenons but I figured I'd maximize the depth of the side apron 1/4" tenon and use a 1/4" + 1/8" twin tenon in the back. The sides also get stretcher so I can put a deeper tenon in at that location.
In theory I'm pleased with this set-up, I think Robert would be too heh.
So here I am at the boring machine. I have a spacer to define the width of the mortises, a spacer defining the horizontal distance between mortises, and a spacer for the vertical dimention of the twin tenon mortises.
Also to make like quite easy with the curved pieces I'm using a small riser block to clamp to which with bring the last 1.25" of the curves to a "flat" plane allowing the tenons to come "straight" from the aprons... Low tech and effective, again.
Mortises made in the side aprons, side stretchers, and sides of the drawer pocket. Funny enough it all worked out so that all these mortises are 1/4" x 1-1/4" which is a happy accident that makes work a bit easier.
And here's that back apron with the "twin" tenon mortises in it. Pretty neat I think!
Next is the scary part... Putting mortises into the legs at all sorts of angles... and I don't have any spares! Yikes!!!
Thursday, May 26, 2011
Subscribe to:
Post Comments (Atom)


5 comments:
I said yikes when I saw that last photo with the different sized mortises. Were they difficult to cut? Looks difficult. Nice design.
I'm with Jeff. Very cool "dueling" mortises.
I love your attitude! Your flexible like your work and you adjust as needed. I know I can personally keep working on that trait.
Thanks for keeping my brain inspired and looking upwards. Well done.
Thanks for the entry. I find your work and method inspirational. I've even incorporated a few "Krenov" details into some recent projects. Thanks again.
Thanks guys!
The mortises were not difficult to cut, just need to be extra mindful of your/my set-up. I've seen people make router jigs that can accomplish such things. I just find the boring machine more stable and reliable for me.
I do like the flexible nature of the work, however that flexibility doesn't exist in all kinds of work. I think I might have a difficult time making an elaborate built-in come out as I intended heh. And you can count me out on being a surgeon! Ha.
Mmmm details. All about the details :).
Nicholas,
Aloha from the Big Island of Hawaii.
I have the same horizontal borer and just got my hands on a shiny new Jacobs chuck for it.
In the past, with the very dull 3/8" bit that came with the machine, I needed massive amounts of clamping pressure to keep the workpiece in place.
I need to make a flexible table/fence/hold down/jig fixture for it. I also purchased the hold-down clamp shown in your photo intending to use it as it appears you are. I was a little disappointed with how weak it seemed when it arrived. With my old dull bit, I figured that it was not strong enough. Now with the ability to use nice sharp bits that cut through the pine I work with like butter, I am hopeful that I may now be able to use the green hold down clamp, perhaps with some assistance from a spring clamp or two.
How has the hold-down clamp worked for you? Does it keep the work from sliding?
Mahalo
Post a Comment