This week's update is a little late but here it is.
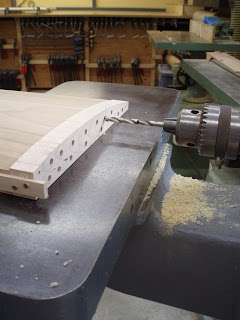
Finally doweling the vertical pieces. seeing as how 2 of these parts are rather wide I used 2 rows of dowels where I could. First the holes were mapped out on doweling jigs, which are used as a guide for the actual hole boring.
 After the holes were made, or wasted rather, I transferred the jigs for an MDF template that would then act as a jig for the horizontal pieces. The paper that is taped onto the MDF was a full sized drawing I used to figure out some of the curves and angles I wanted for the side pieces... why mess with more measurements when I already have it traced out?
More holes!

After I could get the cabinet to stand it was one to some initial surface prep. The Chinese Elm isn't the easiest to plane though you can do it. I have found that a high angle plane is safer for this log but it still gets a little dusty when planing and certain grain lines are left a little more fuzzy than sheared.

Later on it was time for some flattening and surface prep on the larger surfaces. Turn up the mood lights get a good grip on the planes and work up a rocking and sliding sweat but I still have a little more to go.


1 comment:
Stop posting pictures of that slot mortiser =(. I have to either decide to buy a real one...or rig up my router horizontally..
the last time i tried nailing doweling jigs to lay out lines without some sort of spacer...it got pretty bad results. One moved a lil this way, the other moved a lil the other way, what a mess!
That lil showcase/cabinet whatever it is is looking great, glue it together already!
Post a Comment