I'm back before fellow US citizens get lethargic and drunk over the holiday. If that isn't what happens to you, you're probably doing it wrong?
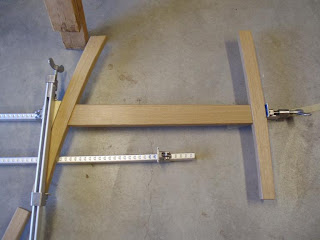
At any rate, the legs and side stretchers have been pre-finished. Here is the second stage of the assembly, gluing the back leg. Per usual I've dealt with this tricky situation in a low-tech way. Worked out for me!
I'm certainly happy to see some bits coming together... for good heh.
While pre-finishing and assembly were going on, I took some time off to work on a new high angle smoothing plane. This wood is called Mora, it's not the prettiest wood out there but it is fairly dense and hard! It's structure reminds me of Shedua as does its odor, though not as "pungent" as Shedua.
I glued it up and will save the rest for another time.
Moving on to arms!
I've been looking forward to working on the arms, the shapeliest pieces of the chair!
With joinery dry fit between the arm and legs I went on to the touchiest part, these reliefs at the back of the arms. This will allow the back frame to connect flush with the arm and the rest of the arm to over-hang a bit. This also allows me to do some shaping to give the arms a slight opening towards the front inviting the user to sit comfortably.
If you haven't guessed, this was done on the router table with a stop-block.
Dialing in the depth of the relief is critical for a good fit and smooth work. I got it to just be proud of the leg allowing me to just use sand paper to finesse it flush. Thus far, this is the only thing I've used sand paper on. Considering it is Oak, I'm quite happy with that.
A couple hours of shaving and good tunes later, this is what came out. Always difficult to photograph these kinds of things. In the end perhaps I will have enough angles to tell a story.
The end grain has only been cut on the table saw and has yet to get its final shaping.
Moving on to the front apron and back stretcher.
Dialed in the dimensions and ends, laid out, and bored for them main knock-down fasteners. I made the dowel holes a tad asymmetrical so that one can only assemble it one way.
To make life easier, I attached a large bit of ply-wood to the drill-press table. Looks a little silly, but worked like a charm!
Looks like I was due for a stupid mistake. It always happens when work seems to be going nice and smooth ha. However irritating, frustrating, disappointing it is, it's not the end of the world. In this case I just plugged the wrong hole with a dowel and glue then tried again. It will not affect the structural integrity of the piece and will not be seen when assembled, but damn. I will NOT make the same mistake on the other side!
Setting the threaded insert. For me, this is a sizable fastener with a sizable thread. Particularly in Oak this is a bit of a scary moment for me. Making the hole tight enough to ensure a well positioned insert, it takes a fair amount of force to set it. Hence the long hex-key just in case. Oak is strong and hard. It doesn't have a ton of give, instead, it breaks. The countersink for setting the insert flush helped against splintering, nice.
Here's where I'm at thus far.
The arms and knock-down rails are not done, but it's almost a chair?
At the moment I'm stuck on the frames, waiting for a router bit I'm not even sure I will use. It was supposed to be in this past Friday or today (Monday). Hopefully tomorrow or I'll be waiting till next Monday. Bah!
Tuesday, November 22, 2011
Subscribe to:
Post Comments (Atom)


7 comments:
The chair is lookin' good man! I really like the lines you've got going on. Your luck with threaded inserts is better than mine. I do use them on certain things, but the ones I use actually strip out REALLY easily if I don't bore the right size hold. Clearly, you've got that dialed in just right. Happy Bird Day.
Thanks Jason. Turns out, I'm having serious issues with the standard threaded inserts I was going to use for the seat and back frames.
I found steel ones which obviously should be stronger than the brass variety. However, the threads are deeper and therefore fatter than the ones from Zipbolt. Perhaps they knew of the issues heh.
If I can't find a tap for the thread, which I somehow doubt I will find, I'm going to have to start a new search :/. And I just spent $50 on this hardware for 3 pieces GAH!
I just took a look at some #10-24 brass inserts I had laying around. The threads on these are much smaller and tighter. I was planing on using 1/4"-20, one size bigger. Perhaps I can locate the same make of these inserts in a 1/4" size and see what happens...
It never ends, does it?
No, no it never does. I have 100% confidence that you'll come up with a perfect solution. :)
Looks like I was due for a stupid mistake.
Thanks for posting that. It makes me feel better knowing that others make mistakes like that. Your chair is looking great.
Of course, we all make mistakes. It's part of life and all.
Philosophically, one can appreciate such things on some levels in our present world. Although appreciating one's own mistake is often easier said than done ha.
looking great little buddy!
Post a Comment