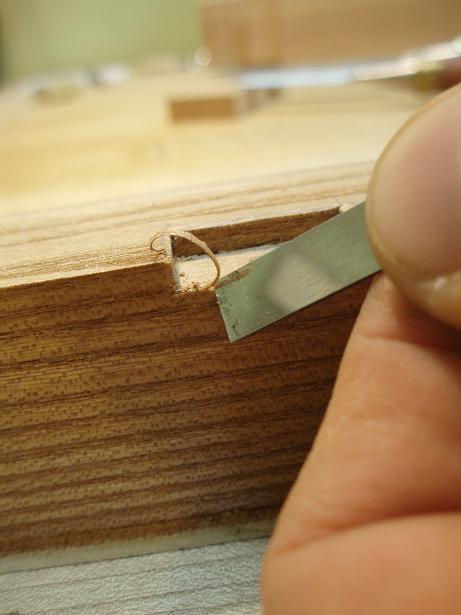
Unfortunately my local tooling shop was having some difficulty with their machinery and I have been left twittling my thumbs over dull jointer knives. It has given me some time to mentally sit on ideas and concerns regarding the whisk(e)y cabinet which seemed to be helpful.
It has also given me (whether I wanted it or not) time to ponder the contents of such a cabinet. In closing of my time twittling I though I might make a post on the likely topic of single-malt Scottish whisky!
I am no authority on whisky. I am just a chap with meager earnings who happens to fancy his beverages be it coffee, tea, beer, whisky, what-have-you. With rising interest in such a stereotypically unapproachable commodity, I though it might be nice to attempt a fellow layman's point in direction to begin or further one's exploration.
The selections featured fit into the $40 and under range reflecting the best prices I have found around the Twin Cities.
The opinions are my own, the photos are not. I've linked them here from browsing images.
In alphabetical order...
- An Cnoc 12 _ Speyside
Bright, shining and complex. Refreshing, as far as whisky goes. This expression shows confidence in the bright side of Speysiders.
- Bowmore 12 _ Islay
Sweeter and softer than some of its kin. This Islay not only offers a nice gateway to the peat, smoke, and brine of the region but plenty of character of its own to enjoy. Imagine a dissolved fisherman's friend (cough drop) in a small rock pool near a seaside campfire.
- The Dalmore 12 _Highlands
Dates on the nose and perhaps some raisin in the finish. These are presumably attributes yielded by the 50% sherry cask maturation. A soft entry and spiced finish makes this an easy "daily dram" or a nice variation to a brighter collection.
- Glenkinchie 12 _ Lowlands
Floral, light citrus, with a wisp of smoke hiding among some grassy notes. Unfortunately there are only two Lowland distillery options we can get here in the U.S. This lowladdie may have a couple quirks but it still paints a lovely picture for me.
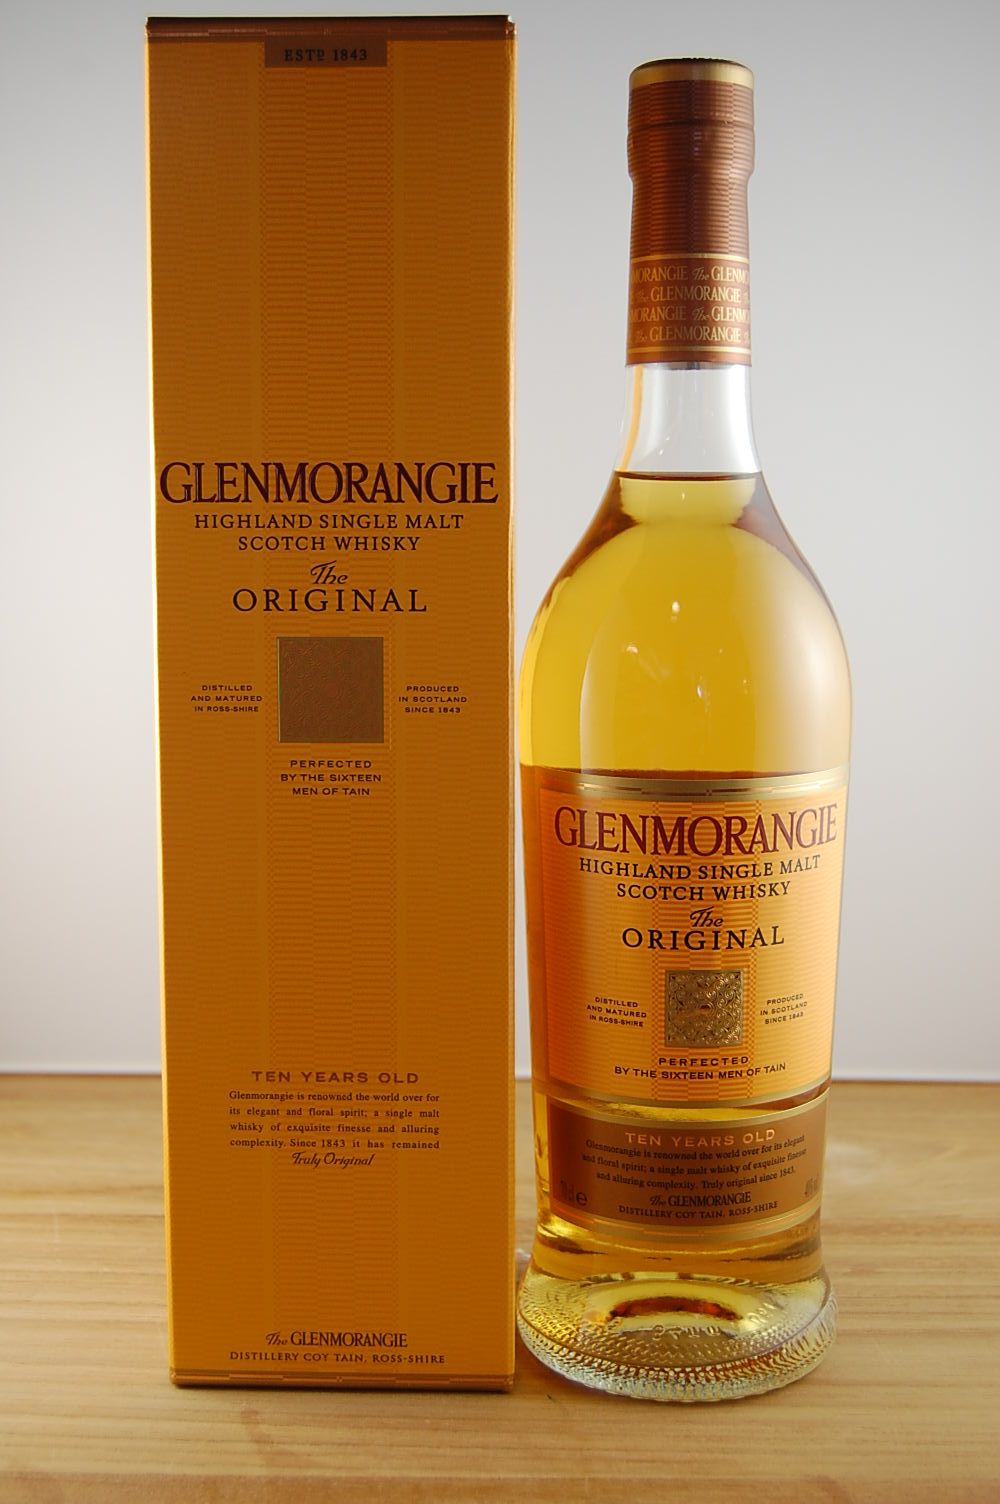
- Glenmorangie Original 10 _ Highlands
Fairly bright and highly complex, such as the An Cnoc 12, however this expression offers a very light hint of smoke. It is also a tad drier perhaps due to the little smoke, or maybe its Highland nature. Either way, you'll have plenty to think about.
- Highland Park 12 _ Highlands (Island - Orkney)
The malt of Highland Park has been touted as "the greatest all-rounder in the world of malt whisky." I am inclined to say that rings true for this group. Hints of peat with a great soft smoke surrounded by a balanced body showing the qualities one might expect to find in a highlander.
- Laphroaig 10 _ Islay
Here's your smoke and peat monster on a "budget." Smoke, peat, briny seasides, iodine, it's all there. For many it can be a love/hate thing. I have yet to decide. Most of the time I'm interested in a "sophisticated" balance, but sometimes I'm in the mood for something more gruff.
- The Macallan Fine Oak 10 _ Speyside
The Speyside region represents about 50% of Scotland's distilleries. If you are looking for an overview of the region I may suggest this number. At "first glance" the Fine Oak 10 may be a bit "boring" or middle of the road. Well, that's the trick isn't it? In furniture craftsmanship I know it is quite difficult to produce something in which nothing sticks out.
Sure, it may be a bit simplistic, but there are quiet details to be found. It also illustrates the qualities shared by many expressions of the region in a fairly clear and unpretentious way.
- Tomintoul 16 _ Speyside
What it lacks in brand presence, design, and packaging, it makes up for in quality and at a bargain price. The Tomintoul 16 has a sophisticated nose with so much to explore it will take your lips some time before greeting this "gentle dram." Among other things, the palate has a lovely vanilla cream taste and texture leading to a very softly spiced finish.
------------------------------------------------
Alright, that wraps up my little list. I hope you've been able to enjoy this divergence from woodwork, or just brush it by.
Rest assured, it's back to shavings, and swarf next time!
Monday, February 27, 2012
Tuesday, February 14, 2012
Liquor Mock
After a few days of sitting around and thinking I'm happy to be working on a mock-up and design for a liquor cabinet geared towards brown liquor/whiskey.
One should be able to store 8 or 9 bottles with enough room to jostle them around a bit without much worry. Depending on the dimensions of bottles I imaging one could fit a couple more in. Perhaps a maximum of 3 deep and 4 across. Myself, I could imagine having 3-7 bottles which works out great because I like space.
On the right side there will be some glass storage with an adjustable shelf. Also a drawer for such things as a tasting journal, watch-glass covers, perhaps your Whiskey Bible, a towel/shammy? Whatever.
I'm wanting this cabinet high enough as to make use of it comfortable but low enough to use the top for service.
I'm looking to make the cabinet integrated with the stand in a way that I have seen before but have yet to make. The top of the "stand" will also be the bottom surface of the cabinet. This therefore has to be a veneer constructed cabinet. This gives me a chance to try another option I have yet to try. A different species of wood in the interior than the exterior.
I'm looking at a Walnut exterior and a White Oak interior. This plays on a couple of things. I'm aiming to make this a fairly masculine piece and play on the craftsmanship of the liquors them selves. What woods are typically regarded as more masculine than Walnut and oak? Also these liquors get their color and shades of flavors from Oak of course. Also the Oak will better illuminate the interior. Walnut? Well there's just something about oil finished Walnut that warms my blood a bit, like a nice glass of whiskey.
I have a feeling this is going to be another simple looking yet fairly tricky build. There are plenty of details and construction considerations to be pondered and re-pondered. Hopefully they wont keep me up too late at night.
I would also like to take this opportunity to mention that I should be bringing the table into it's home, Rustic Bakery tomorrow morning. I also work a closing shift there tomorrow. If you are perhaps interested, come in to see and use this table before it gets abused!
One should be able to store 8 or 9 bottles with enough room to jostle them around a bit without much worry. Depending on the dimensions of bottles I imaging one could fit a couple more in. Perhaps a maximum of 3 deep and 4 across. Myself, I could imagine having 3-7 bottles which works out great because I like space.
On the right side there will be some glass storage with an adjustable shelf. Also a drawer for such things as a tasting journal, watch-glass covers, perhaps your Whiskey Bible, a towel/shammy? Whatever.
I'm wanting this cabinet high enough as to make use of it comfortable but low enough to use the top for service.
I'm looking to make the cabinet integrated with the stand in a way that I have seen before but have yet to make. The top of the "stand" will also be the bottom surface of the cabinet. This therefore has to be a veneer constructed cabinet. This gives me a chance to try another option I have yet to try. A different species of wood in the interior than the exterior.
I'm looking at a Walnut exterior and a White Oak interior. This plays on a couple of things. I'm aiming to make this a fairly masculine piece and play on the craftsmanship of the liquors them selves. What woods are typically regarded as more masculine than Walnut and oak? Also these liquors get their color and shades of flavors from Oak of course. Also the Oak will better illuminate the interior. Walnut? Well there's just something about oil finished Walnut that warms my blood a bit, like a nice glass of whiskey.
I have a feeling this is going to be another simple looking yet fairly tricky build. There are plenty of details and construction considerations to be pondered and re-pondered. Hopefully they wont keep me up too late at night.
I would also like to take this opportunity to mention that I should be bringing the table into it's home, Rustic Bakery tomorrow morning. I also work a closing shift there tomorrow. If you are perhaps interested, come in to see and use this table before it gets abused!
Friday, February 10, 2012
Table Photos
Feels like I haven't had a lot to show for recent work. I suppose it is true with the chair and sofa not yet complete with upholstery. Well here is that table I put together after the sofa.
Highly Shaker inspired but through my own/"Krenovian" eyes and hands. If it were not going to Rustica Bakery I may have thinned down some of the proportions, but I feel I mostly achieved what I was aiming for considering the space.
I had two pairs of stretchers to choose from. A pair with fairly clean straight grain or these pieces with highly curved grain and one with a small group of knots. I liked the more "figured" pair for a bit of more visual interest in a fairly simple form.
The problem was that I wanted to keep all my components straight. With this much curve, keeping the stretcher straight it would visually sag with an optical illusion. What I did in this case was curve the stretcher's tops and bottoms with perhaps a 1/16" amplitude trying to lift the visual sag yet maintain a fairly straight looking component.
Did it work?
There we have it. I don't know when I'm going to get this to the bakery. Hopefully within the next week. I could really use the space in the shop ;).
Speaking of, It seems I may be having a little lag time in starting the next project. I'm aiming to make a liquor cabinet specifically geared towards whiskey and perhaps other brown liquors. Perhaps out of Walnut and Oak, again ha. I can't seem to get away from those for too long. I still have a cabinet out of Cherry in mind for sometime down the road, I haven't gotten any good cherry for it though!
Till next time!
Highly Shaker inspired but through my own/"Krenovian" eyes and hands. If it were not going to Rustica Bakery I may have thinned down some of the proportions, but I feel I mostly achieved what I was aiming for considering the space.
I had two pairs of stretchers to choose from. A pair with fairly clean straight grain or these pieces with highly curved grain and one with a small group of knots. I liked the more "figured" pair for a bit of more visual interest in a fairly simple form.
The problem was that I wanted to keep all my components straight. With this much curve, keeping the stretcher straight it would visually sag with an optical illusion. What I did in this case was curve the stretcher's tops and bottoms with perhaps a 1/16" amplitude trying to lift the visual sag yet maintain a fairly straight looking component.
Did it work?
There we have it. I don't know when I'm going to get this to the bakery. Hopefully within the next week. I could really use the space in the shop ;).
Speaking of, It seems I may be having a little lag time in starting the next project. I'm aiming to make a liquor cabinet specifically geared towards whiskey and perhaps other brown liquors. Perhaps out of Walnut and Oak, again ha. I can't seem to get away from those for too long. I still have a cabinet out of Cherry in mind for sometime down the road, I haven't gotten any good cherry for it though!
Till next time!
Thursday, February 2, 2012
Getting Oily
Alright, where was I? On to shaping?
SO. I gave the legs a bit of a taper using the jointer and a stop block. The taper is slightly over 1/8" thinner at the bottom. A tapered pillowing on the inside/joint side of the legs gives a slight back taper as well. Very subtle though.
I'm giving all the edges of the table a little more substantial "rounding" with slightly more "aggressive" or deeper set plane strokes. My thought here is to be safer in case of bumping into corners/accidents, be a little more robust/accepting of bumps and dings from chairs, and leave a slightly stronger "fingerprint" in line with a slightly rustic leaning.
What I also find with this softening of a Shaker style adds a bit of perhaps Scandinavian Modern side to it. Thus far, I like it.
This is a piece that with cross the middle of the table from one long apron to the other. I bored a normal screw hole in the middle of this pieces to pin the table top at the middle. On either end of this piece I used my "slot mortise" set-up to make these elongated holes for a screw to go into the top and "float" with seasonal movement. Pretty neat.
I've made brass brackets again for top attaching at the perimeter of the base. Here I'm treating the edges of the bracket mortises with a small chisel I had made at IP. Keeping these edges simple and slightly rough.
Boof! The base is dry fit to work on some of the leg end grain treatment before pre-finishing. Here you can see how that middle piece I mentioned works.
Here I am getting oily with a Water Lox marine sealer.
I suppose I'm always excited to see work come together, this time is no different. I'm looking forward to see how this all turns out. It is a bit of a different piece, came together fairly quickly, and the most "exacting" designing I did was just a 3/16 scale drawing. Sort of came together under "intuitions" gathered by previous projects and notions.
But hey, lets not forget this guy...
I finally got to the webbing while waiting on oil on the table.
This is the first time I've completely assembled it. The tweaks I made from the chair prototype feel like they paid off.
A cargo van would make my life easier in transporting this around town though :/ heh. Off to the upholsterer, figure out how/where to take some photography, then to its intended residence!
SO. I gave the legs a bit of a taper using the jointer and a stop block. The taper is slightly over 1/8" thinner at the bottom. A tapered pillowing on the inside/joint side of the legs gives a slight back taper as well. Very subtle though.
I'm giving all the edges of the table a little more substantial "rounding" with slightly more "aggressive" or deeper set plane strokes. My thought here is to be safer in case of bumping into corners/accidents, be a little more robust/accepting of bumps and dings from chairs, and leave a slightly stronger "fingerprint" in line with a slightly rustic leaning.
What I also find with this softening of a Shaker style adds a bit of perhaps Scandinavian Modern side to it. Thus far, I like it.
This is a piece that with cross the middle of the table from one long apron to the other. I bored a normal screw hole in the middle of this pieces to pin the table top at the middle. On either end of this piece I used my "slot mortise" set-up to make these elongated holes for a screw to go into the top and "float" with seasonal movement. Pretty neat.
I've made brass brackets again for top attaching at the perimeter of the base. Here I'm treating the edges of the bracket mortises with a small chisel I had made at IP. Keeping these edges simple and slightly rough.
Boof! The base is dry fit to work on some of the leg end grain treatment before pre-finishing. Here you can see how that middle piece I mentioned works.
Here I am getting oily with a Water Lox marine sealer.
I suppose I'm always excited to see work come together, this time is no different. I'm looking forward to see how this all turns out. It is a bit of a different piece, came together fairly quickly, and the most "exacting" designing I did was just a 3/16 scale drawing. Sort of came together under "intuitions" gathered by previous projects and notions.
But hey, lets not forget this guy...
I finally got to the webbing while waiting on oil on the table.
This is the first time I've completely assembled it. The tweaks I made from the chair prototype feel like they paid off.
A cargo van would make my life easier in transporting this around town though :/ heh. Off to the upholsterer, figure out how/where to take some photography, then to its intended residence!
Wednesday, January 25, 2012
Surfaces
Alright those who may be interested, let me take you on a sweep of my process and "logic" of/in surface prep.
My words are certainly not the final words on the subject but a view into my practices and what seems to work for me.
-Surfaces with Nicholas Nelson
You have your rough lumber, do whatever you need to do to get it down close to size over a period of time.
Stress and/or moisture can often be less than stable in a plank, or the plank has some sort of "equilibrium" of forces keeping it in shape. Cutting away material can let loose these forces.
Don't cut it down to final dimension right away!
I try to take time with my lumber. Let it acclimate to the shop as much as possible. Give it some time to settle after milling away material. And so on.
So, keep it a little fat. I joint the pieces on the jointer again, follwed by the planer again. I mill to "final" dimension when I feel the time is right, or I can't wait any longer.
Though some machines perform better than others, I have yet to see a jointer/planer give a perfectly smooth, flat surface. You will get little ripples by way of the rotating cutter head. However fast it spins it does not apply a continual cut. Usually there is some level of snipe as well.
Enter the hand plane.
A very old tool indeed. A plane is just a jig that holds a blade. The sole of the plane acts as registration for the blade. The sole will ride over bumps and valleys in the surface in a way that the position of the blade will remain "planner" to the surfaces over which the plane is traveling.
Sanding devices do not have this advantage. While one can sand out the ripples and other defects left by machines, the fact is that planes were designed to create and maintain a flat and planner surface. Sure, it is easier said than done. Just like any discipline, accurate hand planing takes practice and accumulated knowledge which will lead to skill.
The hand plane also accomplishes what the typical jointer or planer cannot. A continuous shearing cut the length of your work piece. In my opinion, there is usually nothing better than a freshly sheared, friendly wood in terms of surface quality.
When faced with more difficult woods I will opt for my high angle plane. If that doesn't work I'll try a scraping plane. If not that, then I go to sand paper.
When working with friendly woods like Maple, Walnut, Cherry, etc I typically don't do anything more for prep beyond wiping any dust off with a clean cotton rag before finishing. Another plus for the hand plane/shearing tools, one step surface prep. When working with less friendly woods, such as this Red Elm, I find the surface will be slightly fuzzy, or gritty if the wood contains a fair amount of silica.
This Elm planes fairly well with my high angle plane. I just need something to take care of the small fibers and silica left.
I have used steel wool but Nick B had a good concern that I had forgotten about. Which is the possibility of iron particles trapped in the pores of the wood rusting, depending on finish. I don't really use water carried finishes. Shellac gets methyl hydrate, or I use oils. I'd like to be careful though.
I don't particularly like using the 1000+ grit sand paper that would do the job. It creates more fine dust, clogs quickly, and doesn't perform especially well over rounded surfaces with plane/spokeshave facets left like edge treatments or pillowed legs.
I picked up some non-woven pads by Mirka. These are often used in the automotive paint industry commonly referred to as "scuff pads". I chose their finest "grained" pad which they call "micro fine". I took it on some test runs with an Elm off cut which I'm also using for a finish sample of the oil I plan to use. It seems to be doing the trick! Only problem is, these pads aren't as cheap as steel wool. I imagine I may switch back to steel wool after the the second coat of finish is applied.
Well, I think that about does it!
My words are certainly not the final words on the subject but a view into my practices and what seems to work for me.
-Surfaces with Nicholas Nelson
You have your rough lumber, do whatever you need to do to get it down close to size over a period of time.
Stress and/or moisture can often be less than stable in a plank, or the plank has some sort of "equilibrium" of forces keeping it in shape. Cutting away material can let loose these forces.
Don't cut it down to final dimension right away!
I try to take time with my lumber. Let it acclimate to the shop as much as possible. Give it some time to settle after milling away material. And so on.
So, keep it a little fat. I joint the pieces on the jointer again, follwed by the planer again. I mill to "final" dimension when I feel the time is right, or I can't wait any longer.
Though some machines perform better than others, I have yet to see a jointer/planer give a perfectly smooth, flat surface. You will get little ripples by way of the rotating cutter head. However fast it spins it does not apply a continual cut. Usually there is some level of snipe as well.
Enter the hand plane.
A very old tool indeed. A plane is just a jig that holds a blade. The sole of the plane acts as registration for the blade. The sole will ride over bumps and valleys in the surface in a way that the position of the blade will remain "planner" to the surfaces over which the plane is traveling.
Sanding devices do not have this advantage. While one can sand out the ripples and other defects left by machines, the fact is that planes were designed to create and maintain a flat and planner surface. Sure, it is easier said than done. Just like any discipline, accurate hand planing takes practice and accumulated knowledge which will lead to skill.
The hand plane also accomplishes what the typical jointer or planer cannot. A continuous shearing cut the length of your work piece. In my opinion, there is usually nothing better than a freshly sheared, friendly wood in terms of surface quality.
When faced with more difficult woods I will opt for my high angle plane. If that doesn't work I'll try a scraping plane. If not that, then I go to sand paper.
When working with friendly woods like Maple, Walnut, Cherry, etc I typically don't do anything more for prep beyond wiping any dust off with a clean cotton rag before finishing. Another plus for the hand plane/shearing tools, one step surface prep. When working with less friendly woods, such as this Red Elm, I find the surface will be slightly fuzzy, or gritty if the wood contains a fair amount of silica.
This Elm planes fairly well with my high angle plane. I just need something to take care of the small fibers and silica left.
I have used steel wool but Nick B had a good concern that I had forgotten about. Which is the possibility of iron particles trapped in the pores of the wood rusting, depending on finish. I don't really use water carried finishes. Shellac gets methyl hydrate, or I use oils. I'd like to be careful though.
I don't particularly like using the 1000+ grit sand paper that would do the job. It creates more fine dust, clogs quickly, and doesn't perform especially well over rounded surfaces with plane/spokeshave facets left like edge treatments or pillowed legs.
I picked up some non-woven pads by Mirka. These are often used in the automotive paint industry commonly referred to as "scuff pads". I chose their finest "grained" pad which they call "micro fine". I took it on some test runs with an Elm off cut which I'm also using for a finish sample of the oil I plan to use. It seems to be doing the trick! Only problem is, these pads aren't as cheap as steel wool. I imagine I may switch back to steel wool after the the second coat of finish is applied.
Well, I think that about does it!
Thursday, January 19, 2012
Progress: Rustica
I haven't been getting out much lately. That's just fine, it's cold out and I've been getting good work done on this table.
I had to once again rip the larger planks to be the top apart so that I could mill them. It's a drag, but I just don't have big enough machinery to do much else.
Using my new high angle plane on its maiden project. Thus far this little guy is great!
Elm doesn't plane or work particularly well. Under the plane it is pretty dry and dusty. The high angle is working well though. Before applying finish a quick buffing with steel wool should be all I need.
The final top glue-up after a series of edge joints. Looks pretty darn good from the top and bottom, the end grain will give away the joints though. Oh well, it tells a story.
Already had all my components milled over a few days. Time to think about leg joinery.
I wanted to make this build as simple as possible, something I'm not too familiar with ha. Well turns out I just can't get away that easily. Here's the plan for leg joinery over-head view.
Here it is after the fact. The longer tenons belong to the long apron going the length of the table. This is the only piece spanning the length so it gets both of the twin tenons overlapped. The side is not only shorter (less able to create torque) but it gets a stretcher under the apron. This configuration seems to be a bit of a motif of mine.
There, see? Yes.
How does one trim and square off a table top without a panel-saw, or even a cabinet saw? I don't know. Here's how I did it. A circular saw and a well placed "fence".
It certainly doesn't make a clean cut, which is a drag because this end grain is HARD! I forgot how hard Elm's end grain can be.
Next problem was how to get the piece so I could work the end grain.
Yep, bringing my craftsmanship to a new level...
I had to once again rip the larger planks to be the top apart so that I could mill them. It's a drag, but I just don't have big enough machinery to do much else.
Using my new high angle plane on its maiden project. Thus far this little guy is great!
Elm doesn't plane or work particularly well. Under the plane it is pretty dry and dusty. The high angle is working well though. Before applying finish a quick buffing with steel wool should be all I need.
The final top glue-up after a series of edge joints. Looks pretty darn good from the top and bottom, the end grain will give away the joints though. Oh well, it tells a story.
Already had all my components milled over a few days. Time to think about leg joinery.
I wanted to make this build as simple as possible, something I'm not too familiar with ha. Well turns out I just can't get away that easily. Here's the plan for leg joinery over-head view.
Here it is after the fact. The longer tenons belong to the long apron going the length of the table. This is the only piece spanning the length so it gets both of the twin tenons overlapped. The side is not only shorter (less able to create torque) but it gets a stretcher under the apron. This configuration seems to be a bit of a motif of mine.
There, see? Yes.
How does one trim and square off a table top without a panel-saw, or even a cabinet saw? I don't know. Here's how I did it. A circular saw and a well placed "fence".
It certainly doesn't make a clean cut, which is a drag because this end grain is HARD! I forgot how hard Elm's end grain can be.
Next problem was how to get the piece so I could work the end grain.
Yep, bringing my craftsmanship to a new level...
Thursday, January 12, 2012
Rustica Table
Back again in rapid succession!
While I'm waiting around pre-finishing I thought I'd get started on my next project: a table for Rustica Bakery.
Rustica is the place that I have been working at part-time as a Barista. It is a European bakery and coffee bar producing some of the best products of both fields I've laid hands on AND they wont brake the bank. The space is also not shabby. Not super "swank" but comfortable and approachable.
Mmmm Flax Seed Levain (bread) and Dogwood Coffee in the background.
Espresso being pulled from the lovely Synesso machine I get to work with.
The place of course already is outfitted with seating and tables but there are a couple tables that had never meant to stay. One of which is the bigger table (6 seater) pictured to the right. This is where I see this table project going.
As the name suggests they have a bit of a "rustic" aesthetic going on but it is certainly no "Caribou" cheeky log cabin thing. The aesthetic reflects the product, though more time and effort has gone into their product as it should. There is a level of refinement yet the beautiful variation and humility that comes from things man-made. This of course is more true with their product than the decor, but shall we see what I can introduce?
These are the two main planks I will be using for the table top. This is Red Elm. Craig will perhaps recognize these as a couple he left behind in New Brighton at a local sawyer's barn.
The design I've been fiddling with is HIGHLY Shaker inspired.
This is where we get a little conceptual...
Though Rustica definitely has a European edge to it, it is not in Europe though one just may mistakenly think so when enjoying some baguette and cheese. The decor has more "Americana" than the baked goods and coffee. The interior and identity gives suggestion of perhaps "American Farmhouse". Course grain woods, rusty brown reds, heavier proportions...
Of course something of a Shaker nature should fit right in along with a native tree that tends to have an American connotation... not to mention a similar color palate.
Red Elm typically gets put into gnarly, knotty, heavily rustic pieces. A couple reasons being that the grain structure is, as I see it, inherently rustic. Also the fact that Elm is not a dense nor overly strong wood means that heavier cuts are used to compensate. However I feel a lot of what we see in Elms are perhaps overly compensated a tad, or that compensation wasn't even in mind as much as just wanting a heavy aesthetic.
Well, we shall see what I can do with it. Hopefully it will be strong enough to withstand some punishment. If it goes over well, perhaps I will have a couple more to build... maybe not in Elm, I just may have a lead on some air dried Ash...
While I'm waiting around pre-finishing I thought I'd get started on my next project: a table for Rustica Bakery.
Rustica is the place that I have been working at part-time as a Barista. It is a European bakery and coffee bar producing some of the best products of both fields I've laid hands on AND they wont brake the bank. The space is also not shabby. Not super "swank" but comfortable and approachable.
Mmmm Flax Seed Levain (bread) and Dogwood Coffee in the background.
Espresso being pulled from the lovely Synesso machine I get to work with.
The place of course already is outfitted with seating and tables but there are a couple tables that had never meant to stay. One of which is the bigger table (6 seater) pictured to the right. This is where I see this table project going.
As the name suggests they have a bit of a "rustic" aesthetic going on but it is certainly no "Caribou" cheeky log cabin thing. The aesthetic reflects the product, though more time and effort has gone into their product as it should. There is a level of refinement yet the beautiful variation and humility that comes from things man-made. This of course is more true with their product than the decor, but shall we see what I can introduce?
These are the two main planks I will be using for the table top. This is Red Elm. Craig will perhaps recognize these as a couple he left behind in New Brighton at a local sawyer's barn.
The design I've been fiddling with is HIGHLY Shaker inspired.
This is where we get a little conceptual...
Though Rustica definitely has a European edge to it, it is not in Europe though one just may mistakenly think so when enjoying some baguette and cheese. The decor has more "Americana" than the baked goods and coffee. The interior and identity gives suggestion of perhaps "American Farmhouse". Course grain woods, rusty brown reds, heavier proportions...
Of course something of a Shaker nature should fit right in along with a native tree that tends to have an American connotation... not to mention a similar color palate.
Red Elm typically gets put into gnarly, knotty, heavily rustic pieces. A couple reasons being that the grain structure is, as I see it, inherently rustic. Also the fact that Elm is not a dense nor overly strong wood means that heavier cuts are used to compensate. However I feel a lot of what we see in Elms are perhaps overly compensated a tad, or that compensation wasn't even in mind as much as just wanting a heavy aesthetic.
Well, we shall see what I can do with it. Hopefully it will be strong enough to withstand some punishment. If it goes over well, perhaps I will have a couple more to build... maybe not in Elm, I just may have a lead on some air dried Ash...
Subscribe to:
Posts (Atom)