Tuesday, March 31, 2009

Concave front drawers


Dove tails have returned! I know I haven't updated in a bit due to solitude in my dove tail cave (in the coziest sense, you know a nice little fire to curl up next to, shelter from the world around you...). This time the front is curved, the joints themselves will not be curved but at angles.

Off the bat, or saw in this case, I noticed a boost in my sensory ability since last I was cutting these guys. My kerfs were straighter and closer to my lines making pairing an easier task.


More chopping blocks. These curved parts I had to hold my stock while shaping them, here they serve another purpose. I also had to make 2 angled chopping blocks one for the right side and one for the left because the come in at different angles.


Pins done.


This is a set of tales on my biggest drawer, about 3" tall. The chisel there is 1/16". I am surprised by how much I use this tool.


Drawer bottoms of Japanese Maple on the go. Thanks Dan!!! It is beautiful stuff and goes very well with the piece.


Fast forward a bit as my camera battery died :( but here are the drawers from the back fit without the bottoms. Once the bottoms are made and put it the drawers will need some fine tuning.

OK! this was a brief one but at least it's here!

Tuesday, March 17, 2009

Elmer


Work continues on the Chinese Elm cabinet. While waiting for the drawer stock to calm down I did a little more work on the stand components. Cut the legs closer to height (at least they are all the same height now) and did some rough cleaning of the long stretchers. I'm looking forward to the stand. The Cherry is much nicer to work!


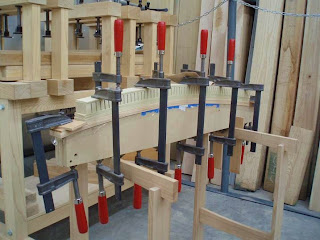
Stack of concave drawer fronts. These are cut and shaped of solid wood. No laminations or veneers here finally!


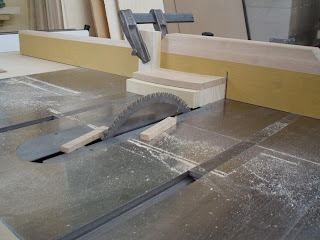
Shooting the drawer sides to height for a snug fit.


I barely got the stock I needed due to the tension in the wood bending the pieces off the saw. I thought I was leaving them plenty on the thick side but with all the correction I came up with 5/16" of straight material which is what I wanted for a finished dimension. So if the marking and fitting of the drawers go well I should end up with a fat 1/4".

Curved fronts call for angled joinery, so here one of the sides is getting its angle cut.


Thinking of cutting curved drawer side angles can be confusing, but once you know what to do it's not. You don't need such a "thorough" cradle, really you just need a riser block or two and some double sided tape. I already had this and it's male mate for shaping the fronts so why not use them? I will be slightly modifying this block for used in a chopping block much like the set-up I used for my last curved dovetails but on a different axis.


Backs are cut at the same time to ensure a proper fit.


I used my tiny spokeshaves to do some touch-up work on the fronts after being cut. This picture makes it look pretty big but the blade is a bit under 1"! these little guys are around $25 from Lee Valley but are pretty much useless with the blades that come with them. I made the new set of irons before the new-year and have found that these function not only as legitimate but fine tools in the called for applications! The labor to make the irons from a cheap file will take the better part of a day which of course add cost to the tool. However when the time comes that all your other spokes shaves are too big and a chisel is too clumsy you'll chuckle while zipping away with a mini shave leaving a finish-ready surface... or maybe that's just me.

Monday, March 9, 2009

Photo Reel


It's been a little while since the last Elm Cabinet Update. So here's a quick "photo journal" of what's been going on.


Yes, dowel crazy. Does it need that much? Probably not, but it's not going to hurt!


I glued in the back panel at the same time as the the top because I have no horizontal rebates for it to sit in. It could be fit after the doweling but it would be pretty tricky and you only get one shot at it. It made more sense to cut the back to height at the same time as the sides then just fit it along it's width.


I miss the stage so I do what I can with the available lighting to make it more dramatic or powerful?


Fit Partitions, Check.


Early in the week I took a lovely day in Vancouver where I met up with an artisan alumni and friend of the school, Dan. He has lots of small-ish planks of wood in his shop(s{house[property/neighbor's property\]}). As I understand almost all of it is locally felled within the city! Here is some Maple, and Japanese Maple for drawer sides and bottoms. What a guy! Thanks Dan!!!


Lamination for front and back aprons Check.


And finally here is the door in the press applying the veneer with aid of a Poplar form. The for is quit over-sized because it was what I used for the back panels. I happened to find a good fit of curve on the SAME form! Good thing I checked before I went ahead and cut it up to make a new one!

Things are progressing thought I have a strange combination of feeling like I've been taking it easy and getting work done...
mixed in with this work I have been making some "drawings" for a chair hopefully to come. More on that later!

Friday, February 27, 2009

Arbutus Box Photos


Photos by Ingeborg Suzanne.

Tuesday, February 24, 2009

preped for finish


As the project gets closer to a glue up the visual changes become smaller and often the prep is a lot of the same procedure for most of the pieces. This isn't bad of course but a bit on the boring side for stories and photos of which I have few this week.
Here chopping the corners flat, square, and consistent. I put a couple locator dowels in the bottom piece and put the op over that so the horizontal pieces would align the way they will with the sides in place. Then clamped a corner chopping block I made to the top where I could get a thin but clean chop.


Hinge mortise. I'm always amazed at how many chisels I use for such tasks. But this work isn't really about making do.


Set up for edge treatments. A seemly small step but they take a while to do. I hear that in some traditional Japanese woodwork the edge treatment is one of the most important features and only highly train craftsmen perform the treatments.

Tuesday, February 17, 2009

Doweling


This week's update is a little late but here it is.
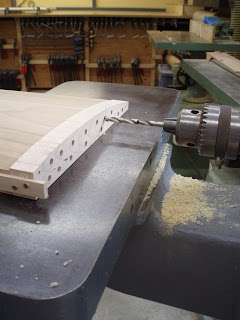
Finally doweling the vertical pieces. seeing as how 2 of these parts are rather wide I used 2 rows of dowels where I could. First the holes were mapped out on doweling jigs, which are used as a guide for the actual hole boring.

After the holes were made, or wasted rather, I transferred the jigs for an MDF template that would then act as a jig for the horizontal pieces. The paper that is taped onto the MDF was a full sized drawing I used to figure out some of the curves and angles I wanted for the side pieces... why mess with more measurements when I already have it traced out?


More holes!


After I could get the cabinet to stand it was one to some initial surface prep. The Chinese Elm isn't the easiest to plane though you can do it. I have found that a high angle plane is safer for this log but it still gets a little dusty when planing and certain grain lines are left a little more fuzzy than sheared.


Later on it was time for some flattening and surface prep on the larger surfaces. Turn up the mood lights get a good grip on the planes and work up a rocking and sliding sweat but I still have a little more to go.

Sunday, February 8, 2009

slowly


Progress is happening, but slowly. I can measure it by beard as I haven't groomed my face since I got the main substrate together... I think.
Here are the substrates for the main vertical pieces. Since they are shaped I'm using lumber-core. Glue up a bunch of slats orient the grain so that pieces opposite of their neighbors, and put a cross-band of veneer over them AFTER shaping and they you go. Easier said than done of course.


This would be the form for the back panel(s) before shaping.


Drawer partition substrate to get a thickness I fell was right I had to modify the 1/8" 3-ply that we had with 2 more plys. Though after Ian's mentioning I'm now considering doing web frames instead. Hmmm.


This is basically what I have so far. The main surfaces have been veneered, received bake-ins, and applied edges on the front and back. The vertical members have been shaped, veneered, and currently have applied edges as well. The panel underneath was made with 3 layers of 1/8 plywood. Then there is the Euro Cherry leg stock taken down to pre hand work thickness and width.